Trick Or ReTreat: Building a Custom Environment - Phase 1 🏃
So far in this series, I’ve explored the key concepts of OpenAI’s Gymnasium and Stable Baselines3, showing how to use these libraries to train reinforcement learning agents. I demonstrated training a pre-defined Lunar Lander environment using their PPO algorithm from Stable Baselines3 and how to evaluate the agent’s performance.
Before starting this project, my knowledge of reinforcement learning (RL) was purely theoretical - I had never attempted to implement any of the concepts. To avoid feeling overwhelmed by the complexity of building custom environments, I decided to break the project into three phases:
-
PHASE 1: Building a Single Reward Environment
-
PHASE 2: Adding Extra Rewards and Penalties
-
PHASE 3: Adding Dynamic Movements
I will describe each of these phases in detail, explaining how I built the environment and trained the agent including a video showing the agent’s performance post-training. Each phase will be covered in a separate blog post to break up the content!
Reframing the Agent’s Objective
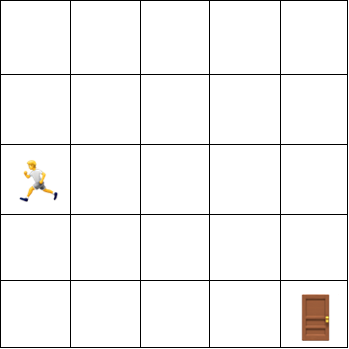
In this environment, the trick-or-treater 🏃 is the agent, and the exit door 🚪 is the target.
The agent is placed randomly in the haunted mansion and must find the exit door to escape!
- There are 4 actions the agent can take: up, down, left and right.
- The game terminates when the agent has reached the exit door of the haunted mansion.
- A reward of 1 is given when the trick-or-treater finds the door.
- No penalty is given for the number of timesteps taken to find the door.
Implementation
As discussed in the previous post, an environment is typically represented as a class and has different attributes and methods. We’ve already explored some of these methods like reset() and step(). When building a custom environment, you need to define these methods yourself since you’re essentially designing the environment from scratch.
To get started, I referred to the OpenAI Gymnasium documentation[^1] as it was incredibly useful. I spent some time studying the code and used their snippets as a base for my own environment.
__init__: Initialising the Environment
Input Parameters

-
size: Specifies the size of the environment grid. The default is set to 5, meaning the grid will be 5x5. I made the assumption the grid is always square (the number of rows is equal to the number of columns). -
render_mode: Defines how the environment is visualised. The default value is ‘human’, there are no other render_modes available as for this project ‘human’ is sufficient.
Setting Up the Grid and Render Mode

Set up the grid size based on the size input parameter and rendering mode to render_mode parameter, to be used in other methods.
Initialising Agent and Target Locations

Target location represents the location of the exit door, the main target for the agent. Here, I set up the starting location for the agent as an out-of-bounds position and the target location as a fixed point on the grid. The reason I set the agent to be out of bounds is as the location of the agent is to be randomly selected in the reset function.
Defining Action and Observation Spaces

Action Space is of type Discrete with 4 possible values (up, down, left, right). I use action_to_direction to map the different actions to grid directions. For example, the action right is represented by [1, 0], which is used to add 1 to the agent’s x-coordinate.
Observation Space is represented using Dict of both the agent’s and target’s locations both are defined as Box spaces to allow for grid coordinates.
Please refer to earlier posts for a more detailed explanation of these types and spaces.
Visualisation using Pygame

After looking at several articles and tutorials, I decided to use Pygame for rendering the grid-based environment, as it offers flexibility and ease of use.
When the render_mode is set to ‘human’, Pygame is initialised. The screen size is set to 800x800 pixels, and the size of each grid cell is calculated based on the total screen size and the grid size.
_get_obs: Returning Observations

This method returns the current state of the environment by returning the agent’s location and the target’s location.
_get_info: Returns Distance Between Agent and Target

This method calculates and returns the Manhattan distance between the agent and the target.
reset: Resetting the Environment to an Initial State
Input Parameters

-
seed: Controls the randomness in the environment, default is set to None. -
options: Not used.
Setting the Agents Location

Choosing to set the agent at a random location to encourage exploring.
Returns Initial Observations and Information

After the agent’s location is set, the initial observations and information are retrieved by calling the _get_obs() and _get_info() methods.
-
Observations: Includes both the agent’s and target’s current grid positions.
-
Information: Returns the distance between the agent and the target (exit door), which could be used by the agent to learn and navigate more effectively.
Observation and info are both dictionaries.

step: Updating Environment After Action is Taken
Input Parameters

- Action: The action taken by the agent, action must be one of the four actions from the action_space.
Updating the Actions Position

First, the action passed to the method is converted to a direction using action_to_direction defined in __init__().

The agent’s position is updated based on the direction.
np.clip() is used to ensure the agent does not move out of bounds of the grid.
After an action is taken, the agent’s new x, y coordinates (self.agent_location + direction) are calculated. These new coordinates are then “clipped” using np.clip() to make sure they stay within the valid range of the grid from 0 to 4 (self.size – 1).
If the new coordinates fall outside this range, np.clip() adjusts the coordinates, ensuring the agent remains within the grid bounds. This prevents the agent from stepping off the grid.
Setting the Truncated and Terminated Flag

No need to set the truncated flag as environment is simple and so did not expect the agent to take too long to set a time out of steps.
Terminated flag is set to ‘True’ only if the agent’s position matches the target position.
Reward

The agent gets a reward of 1 if it reaches the target position (exit door), in other words only when the terminated flag is set will the agent get a reward, otherwise it gets no reward (0).
Return Statement


After updating its observations and info after taken an action, the method returns:
-
observation: The current state of the environment (positions of the agent and target).
-
reward: The reward based on the agent’s action.
-
terminated: Whether the agent has reached the target.
-
truncated: Always set to False in this environment.
-
info: Additional information about the environment, such as the distance between the agent and the target.
render: Visualising the Environment
Event Handling:

If event type is QUIT, the display window closes.
Grid Drawing:

The background colour of the grid is set to white to complement the background of the images used for the agent and the target.
The method loops through the rows and columns of the grid to draw the cells. Each cell is represented as a rectangle to create a grid effect on the screen this makes it easier to visualise the agent’s and target’s positions.
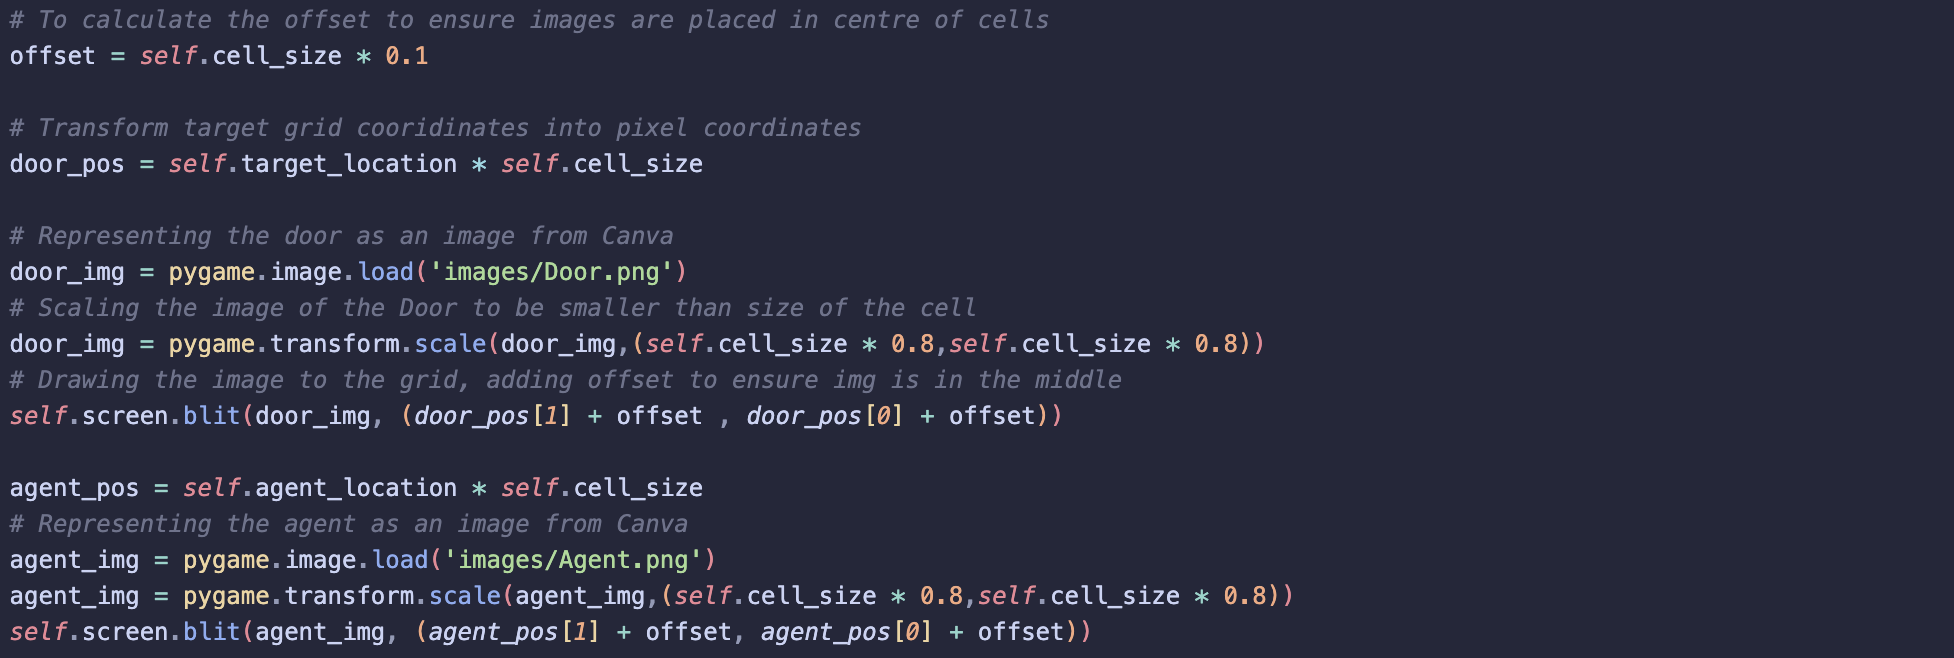
The grid coordinates of both the agent and the target are converted into pixel positions.
Images for the agent and the target are loaded from Canva, scaled to fit within the cells and are displayed on the screen using blit().

To update the screen after each action the agent takes, I used `update() to make sure the display mirrors the agent’s movement and environment state.
close: Closing the Environment

To close the Pygame rendering window.
Registering a Custom Environment

This line of code registers the custom environment with Gym so Gym can now recognise and load it like any other pre-built environment.
-
id= ‘Haunted_Mansion-v1’: Name to give your environment. -
entry_point= ‘simple_env:Simple_Haunted_Mansion’: The path to the class that defines the custom environment. In my project I stored the environment class as a python file.
Now I have built my custom environment, I moved to the training of my agent.
Training
To train the agent, I used the same approach as with the Lunar Lander by implementing the Proximal Policy Optimisation (PPO) algorithm from Stable Baselines 3.
Environment Set Up

The first step was to create the environment and vectorise it using DummyVecEnv, this time with 3 instances of the environment. For more details on vectorising environments, please refer to the previous post.
This time, I added an extra step: wrapping the environment in a Monitor wrapper to extract logs during training. The goal here is to gain a deeper understanding of what is happening during training. Since multiple environments are running in parallel, I used VecMonitor instead of the standard Monitor wrapper, as it’s specifically designed for multiple environments. The logs are saved to the log_path defined earlier.

Using PPO

I initialised the PPO algorithm, but this time I used the MultiInputPolicy instead of MlpPolicy because the observation space is of type Dict and contains multiple values. I used the PPO model to train the agent, setting the total timesteps to 50,000 since the environment is fairly simple.
Extracting Logs

I saved the path to the monitor log file to track the training progress. The monitor CSV file logs the rewards per episode, the length of each episode (in timesteps), and the timestamp. For this project, I’m only concerned with the first two metrics: reward and episode length.

I used Pandas to read the CSV file into a DataFrame, skipping the first row, which contains metadata.

I then saved the episode rewards and episode lengths throughout training into separate variables by using series from the DataFrame.
Plotting Rewards and Length
To better inspect the training progress and performance of the agent, I took rolling averages of the rewards and episode lengths. This helped to reduce the noise in the data by averaging values over a 100 episodes.

Rewards
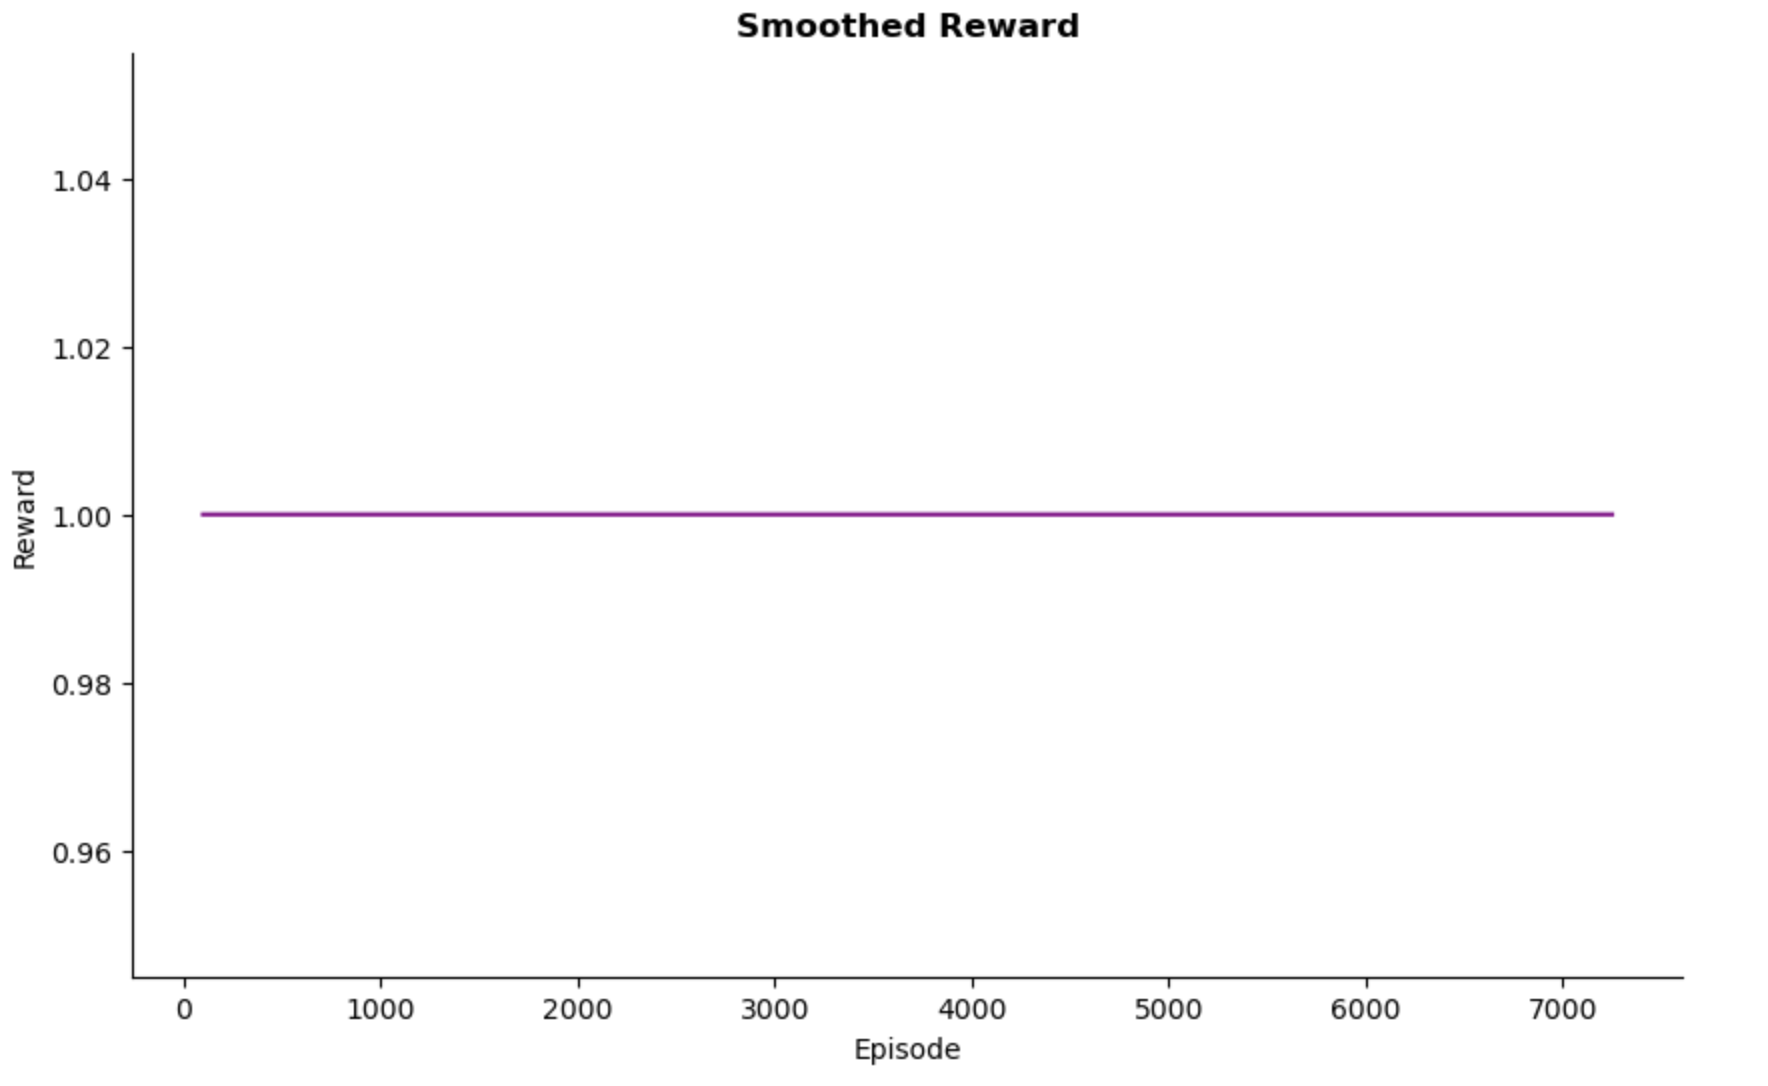
Since the task completion reward is set to 1 for success and 0 for failure, the reward graph from the training logs appears as a horizontal line. As I progress to a more complex environment adding more rewards and penalties, this graph will look different.
Episode Length
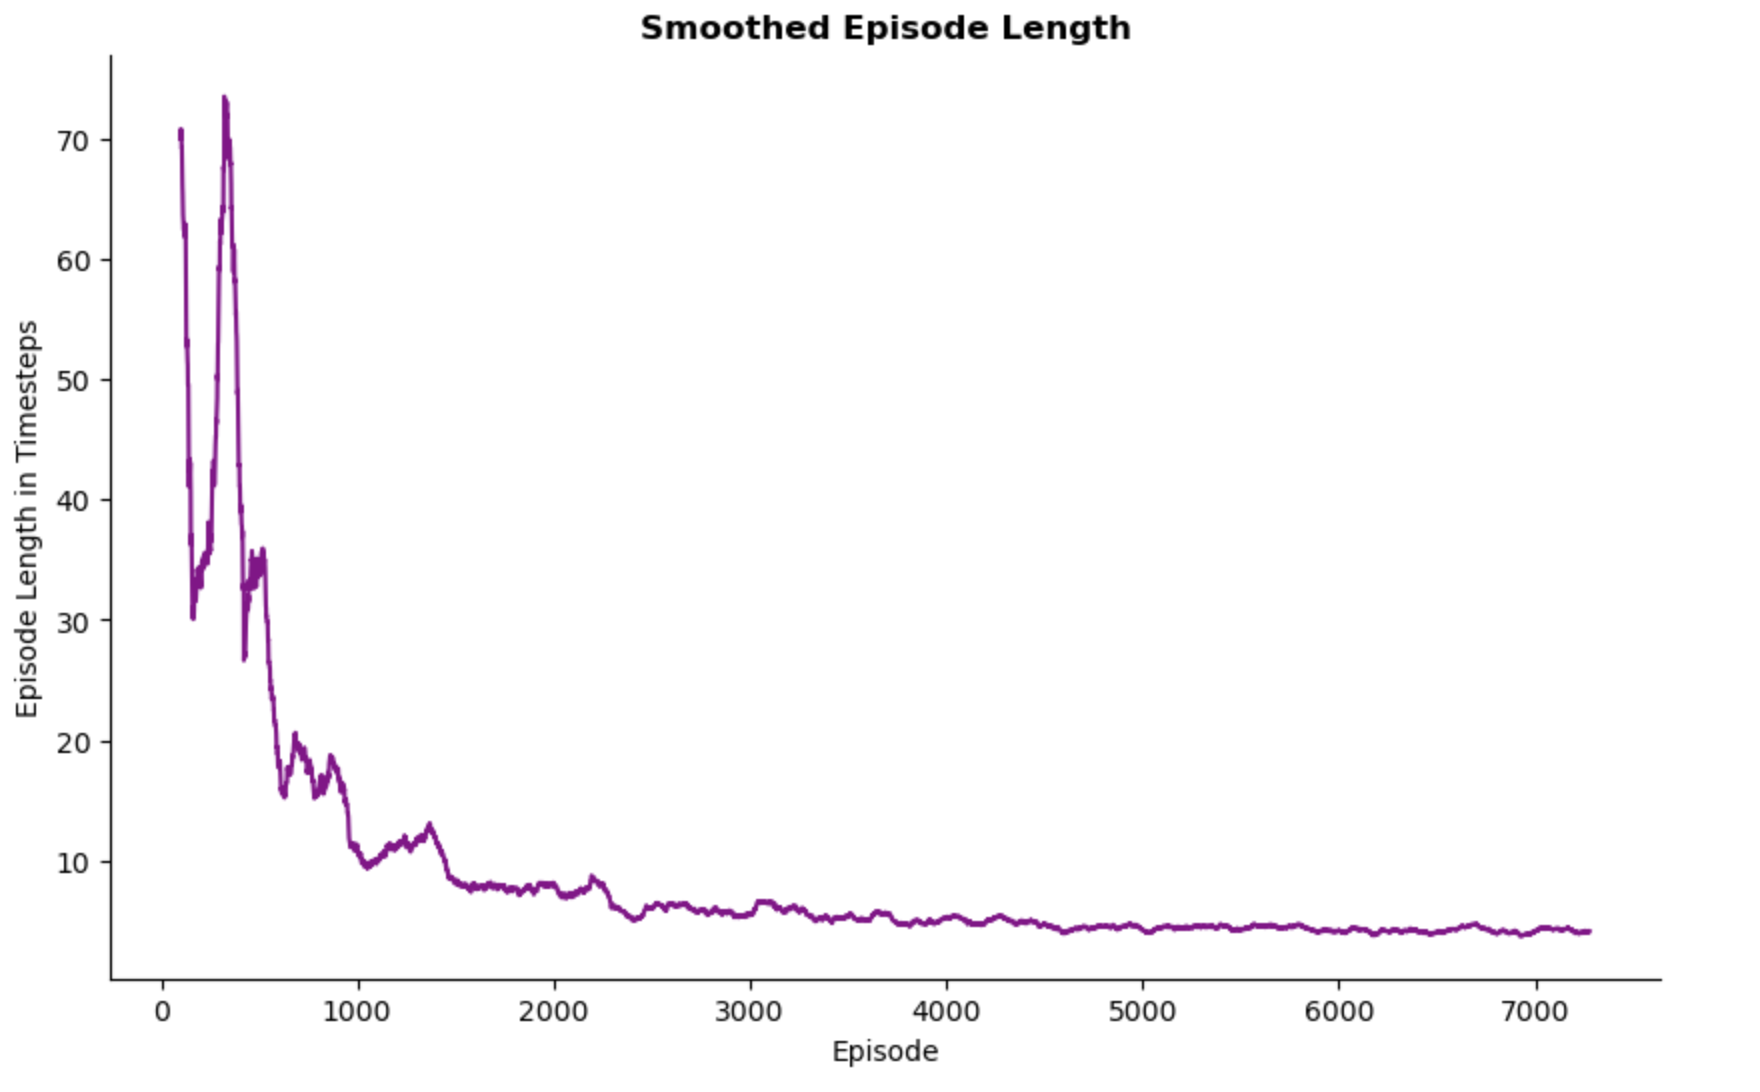
Early in the training the agent takes a more timesteps to complete the task. This is expected in RL as the agent prioritises exploration during the early stages, trying different actions to better understand its environment. As a result, it requires more timesteps per episode.
As the training progresses, the agent refines its policy and begins to exploit what it has learned, leading to fewer timesteps per episode. The curve begins to plateau around episode 3000, which indicated that the agent’s policy has become more effective in completing the task. This stability in timesteps suggests the agent has learned a near-optimal path.
Testing the Agent
Similar to the Lunar Lander setup, I tested the trained agent over 15 episodes to evaluate its performance.
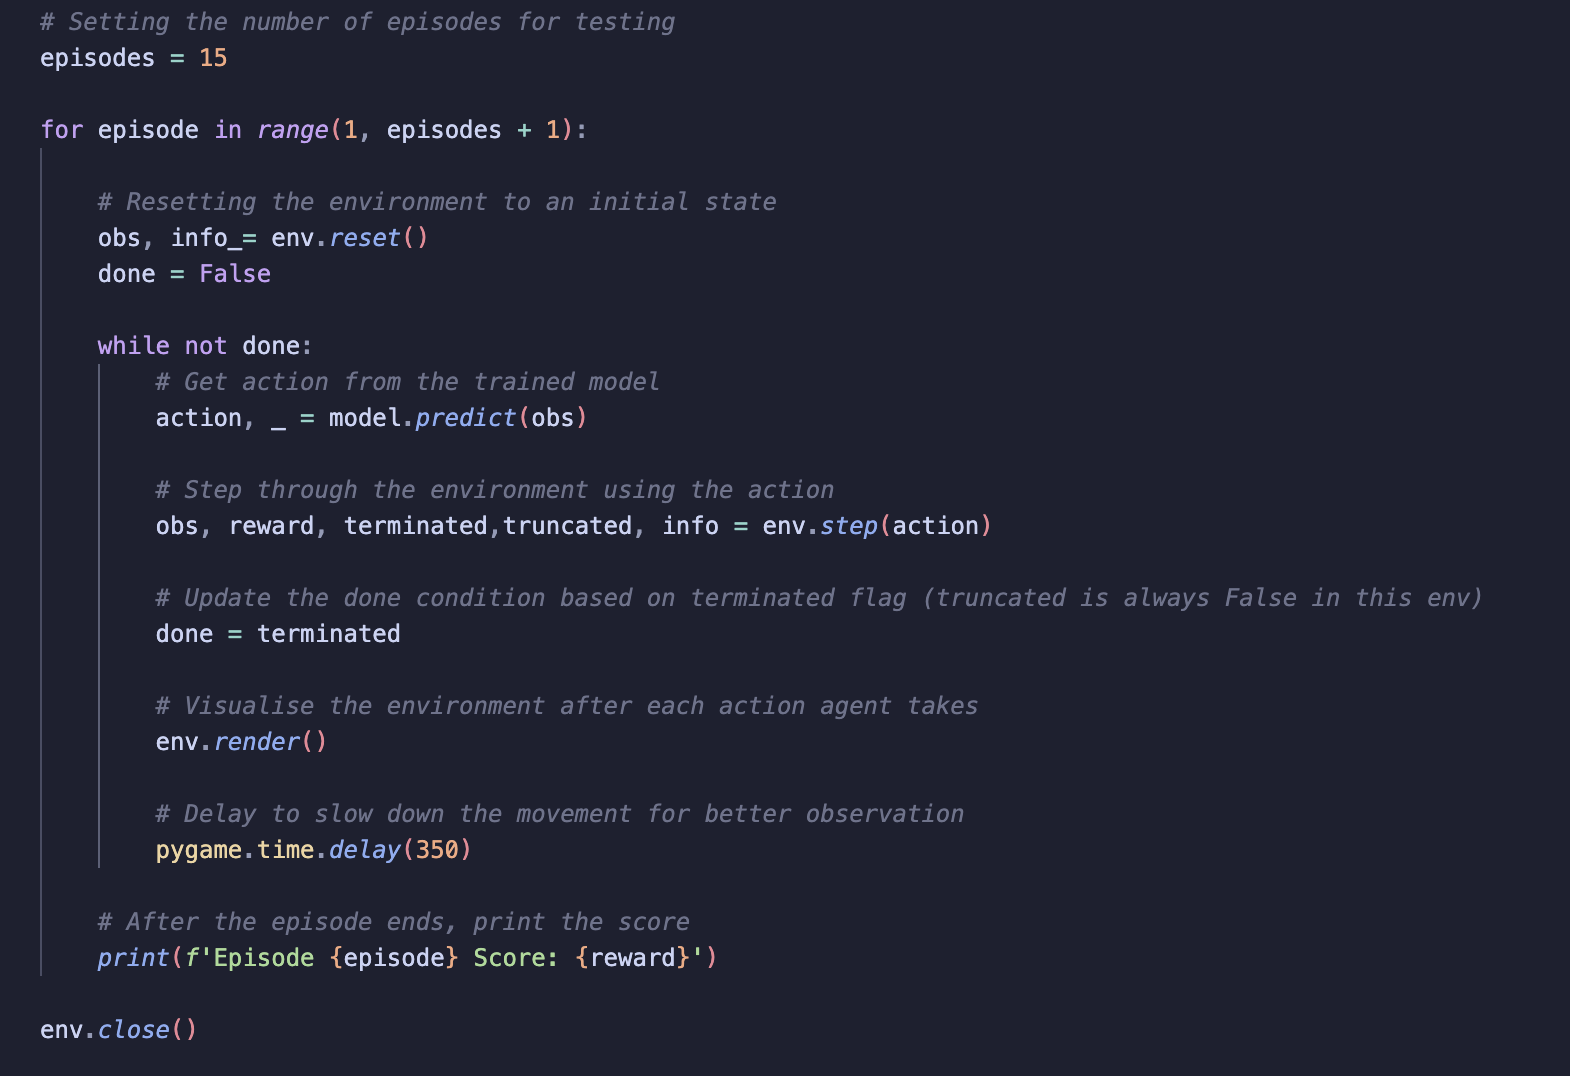
The primary purpose of this testing phase was to ensure that the rendering and environment setup work correctly. This includes action updates, reward updates and rendering.
Visualisation
Summary
In this post, I’ve outlined the steps I took to build a simple custom environment using Gymnasium. I also demonstrated how I trained the agent and included a video to showcase the agent’s performance in the custom environment.
Now that I have a basic environment working, I will move on to adding more complex rewards to increase the environment’s difficulty. As the environment becomes more complex, it may require a more advanced algorithm than PPO, this is where I plan to explore Q-learning.
References
[1] https://gymnasium.farama.org/introduction/create_custom_env/